Baichuan2-13B 量化及 API 部署

图片来自 DALL·E 3
Prompt: photo portraying a cutting-edge AI landscape with bright neural connections, detailed digital circuits, and abstract data designs. The dominant title ‘Baichuan2-13B’ is placed at the top, with the accurate subtitle ‘Xinference’ positioned right beneath, both presented in contemporary typography.
Baichuan2-13B 在不量化(fp16)的情况下,需要 27.5GB 的显存才能加载成功,这正好是我们手里 24GB 显存的显卡(RTX 3090/4090) 够不到的;量化后,在 8bit 精度下只需要 16.1GB 显存就能加载成功了,量化前后的显存占用量参考Baichuan官方文档。
不过,官方并没有提供量化好的 8bit 版本,需要我们自己量化;此外,官方只提供了命令行和 Web UI 两种形式的 demo,没有提供 API 相关的 demo,应用层使用需要自己实现 API 或者使用其他工具实现 API。
这里将实现量化的步骤,以及使用 Xinference 提供 API 的方式记录下来供大家参考。
服务器环境
- Ubuntu 22.04
- Python 3.10
一、从 Huggingface 下载模型
- 安装 git-lfs
Huggingface 上的模型文件及其配置文件等,是通过 Git 仓库管理的。由于模型文件属于是比较大的二进制文件,使用 git-lfs 来管理,需要先安装 git-lfs。
1 | (. /etc/lsb-release && |
1 | sudo apt-get install git-lfs |
- 下载模型相关文件
从 Huggingface 下载模型相关文件:
1 | git clone [email protected]:baichuan-inc/Baichuan2-13B-Chat |
二、离线量化
1 | pip install accelerate colorama cpm_kernels sentencepiece streamlit transformers_stream_generator xformers bitsandbytes |
1 | import torch |
查看 ./Baichuan2-13B-Chat-8bit 目录下,会有量化后的模型文件。
三、使用 Xinference 提供 API
- 安装 Xinference
1 | pip install "xinference[all]" |
- 启动 Xinference
1 | xinference -H 0.0.0.0 -p 3333 |
- 使用 Xinference 加载 Baichuan2-13B-Chat-8bit
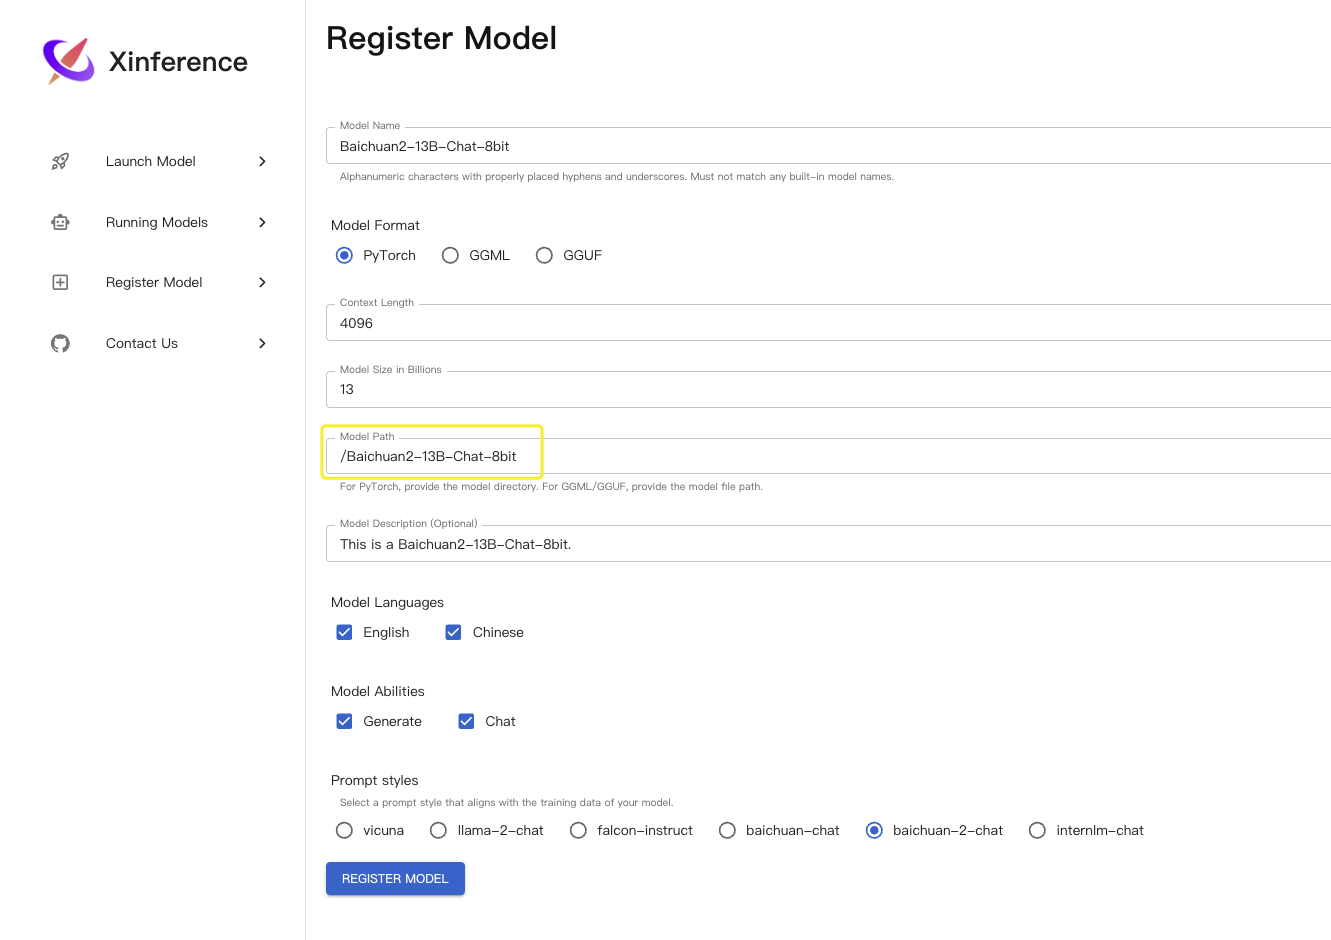
Xinference 提供的 web 页面可以很方便地加载本地模型,打开页面后,在 Register Model 页面填写
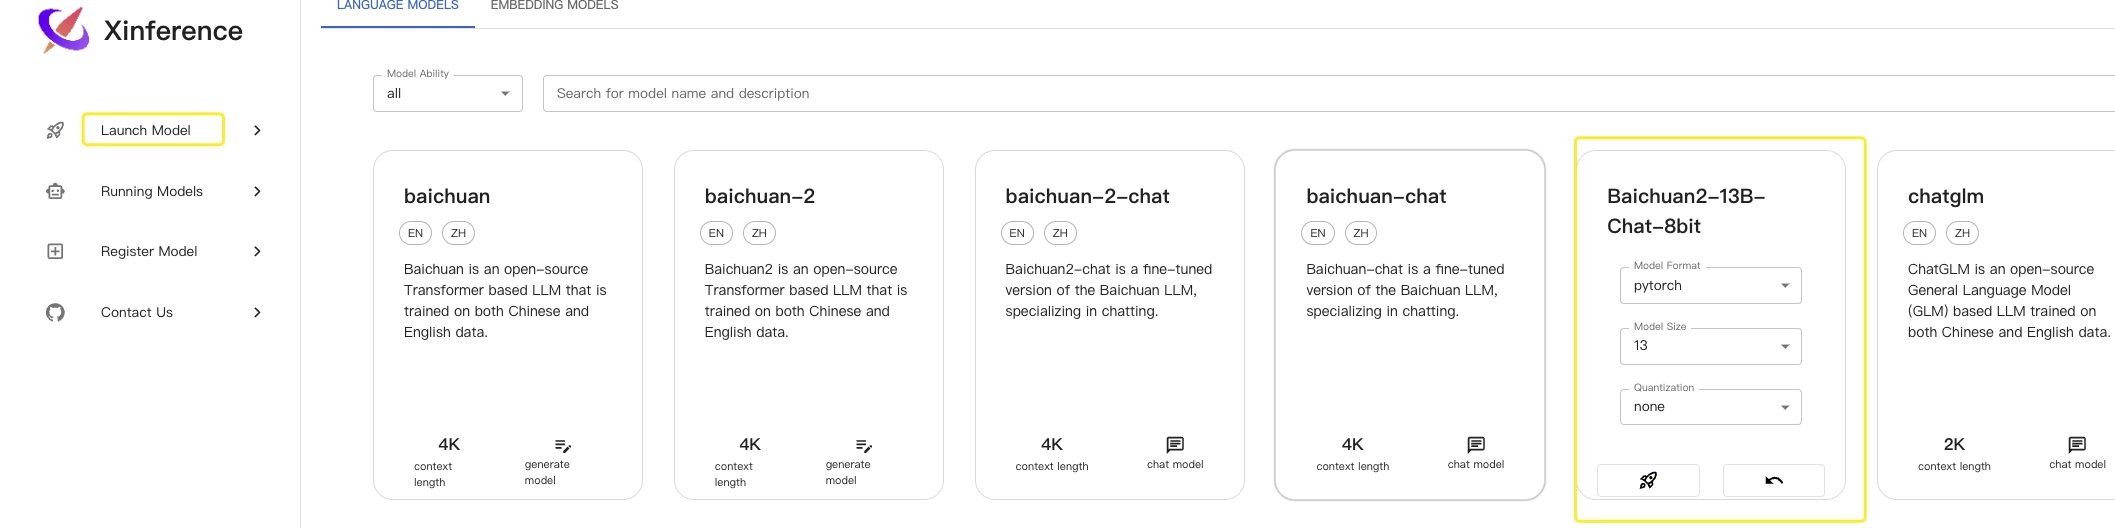
然后在 Launch Model 页面 Launch 即可
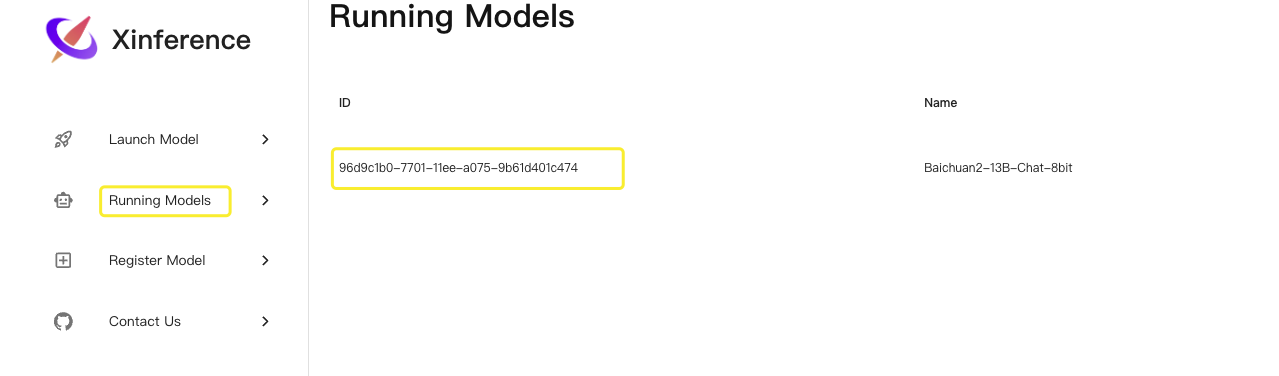
在 Running Models 页面能看到正在运行中的模型,其中 ID 是我们需要用到的
- 测试 API
Xinference 提供的 API 格式跟 OpenAI 的 API 格式一致,比如,在使用 OpenAI 时:
1 | curl --location --request POST 'https://api.openai.com/v1/chat/completions' \ |
换成 Xinference 的 API 时:
1 | curl --location --request POST 'http://127.0.0.1:3333/v1/chat/completions' \ |
其中
model参数填写的是我们在上一步看到的那个ID。